How I Recovered
My Lost Digital Photos

NOTE
Since I first wrote this document, some superior image recovery tools have become available. The original technique is presented below, but you may wish to try the following tools first:
How It Happened
I'm a big fan of digital cameras, but I was about ready to switch back to film cameras when I lost half the pictures I took on a recent trip. Although I'd successfully downloaded one 32M card worth of pictures, some nasty interaction between Windows 2000 and my NewMedia card reader caused my second 32M card to get corrupted.

Geeky Background Info
Virtually all computer disks -- floppy drives, hard drives, even CompactFlash and SmartMedia cards -- have something called a file allocation table. Essentially, a file allocation table (FAT) is a table of contents that tells the computer where files on the disk start, how long they are, what their names are, etc. If your disk's FAT gets corrupted or lost, the computer has no way of knowing what data on the disk was part of a file. Another interesting note is that when the computer deletes a file, it doesn't actually delete the file's data, it just removes that file's entry from the file allocation table. The actual contents of the file are still out there on the disk somewhere.

What Happened
Windows 2000 didn't just delete or corrupt my files, it somehow managed to replace the file allocation table on my "B" SmartMedia card with the file allocation table from my "A" SmartMedia card. The pictures were all still there on "B", but with the wrong table of contents (FAT), they might as well have been gone. Oh, sure, the computer thought it had a bunch of JPEG files (that's what was in the file allocation table from the "A" card) but they were different sizes, in different places on the disk, etc. Which meant that when I tried to look at any of them, the computer read in the wrong FAT data and got all confused about where the pictures were. It couldn't find the start of any of the images -- kind of a critical thing if it's actually going to load one. Argh!

First Attempt
The first thing I did was put the damaged card into one of my Unix systems, where I used a Unix tool called "dd" to save a copy of the SmartMedia card to a file that I called smcard.img. Just for kicks, I then used dd to copy that disk image file to the "A" card. (I'd already downloaded the "A" card's images to my hard drive, and having a copy of the corrupted "B" card meant I could mess around with recovery tools and not worry about the original damaged SmartMedia card ("B") getting overwritten during the course of my recovery attempts.) Then I put the copy of the damaged card ("A") back into my Windows 2000 system and unleashed Norton Utilities' "Disk Doctor" on it. It created a directory called FOUND.000 and a bunch of files called things like "FILE0001.CHK". After renaming them all to have JPG extensions, I tried to open the files up. Unfortunately, only about 25% of them were valid JPEG images. Not bad, but I wasn't satisfied with 25%. I wanted my images back, dammit!

Weird Problems Call For Weird Solutions
My wife used to work in the digital photography industry, and had some smart coworkers. One of them, Russ, sent her some info on how he recovered pictures following a similar twist of fate. One of the key things Russ said was that all JPEG files start with the hexadecimal string "ffd8ffe11c4545786966" and end with the hex string "ffd9". Hmmm... knowing how files start and end, and having a large file containing all the data from the corrupted card, couldn't I write something to pull out images? A couple of hours of Perl hacking later, I had a program called jpg-recover that managed to completely save all but ~8 of the pictures, and at least gave me a glimpse of all of them. Feel free to download and use jpg-recover -- I hope it'll save you the anguish of losing your pictures. Please read the comments at the top of the file, and realize that you may need to tune some of the variables for optimal performance.

Windows Users      (Unix users can skip this section.)
If you don't have access to a Unix system, you can probably still use jpg-recover to recover your pictures. First, instead of dd, you'll probably use something like Undisker. (Note: you don't have to use Undisker, but it's very well suited to this task. If you have another program you'd prefer more, that's fine.) You'll also need a Perl interpreter for Windows. The folks at ActiveState distribute ActivePerl free of charge, so download and install it. The default installation settings are fine; when I tried it and made the screenshots below, it installed itself into C:\Perl, which is perfect.

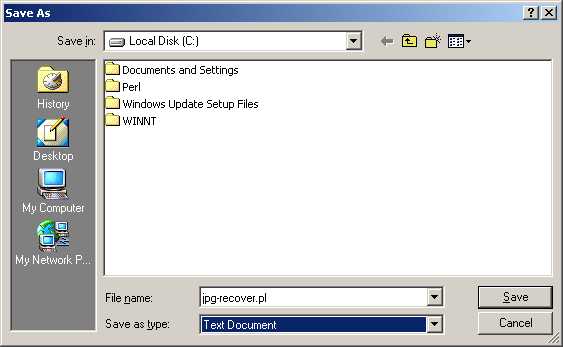
Once you have ActivePerl installed, download jpg-recover by right-clicking on the link and selecting "Save Target As..." Save it to your C:\ directory as shown here. Make sure you save it as jpg-recover.pl -- ActivePerl will need to see the .pl extension to recognize it as a Perl program.

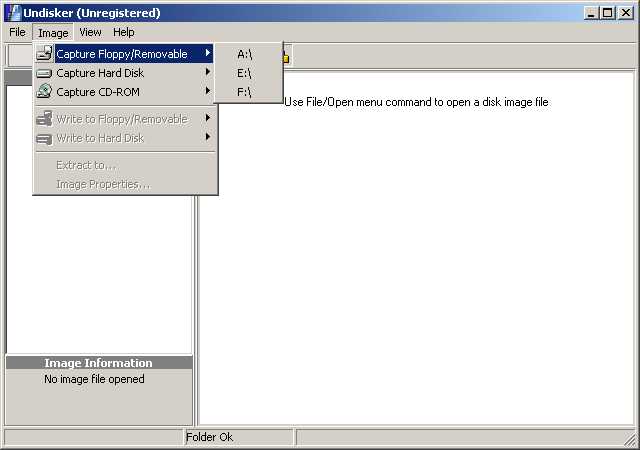
Now that you have the program, you'll need to download and install a program like Undisker. (Please note that Undisker is shareware -- if it helps save your pictures, PAY FOR IT!!) Once Undisker is installed, run it. In the Image->Capture Floppy/Removable menu, select the removable drive that corresponds to your card reader or digital camera, like this:

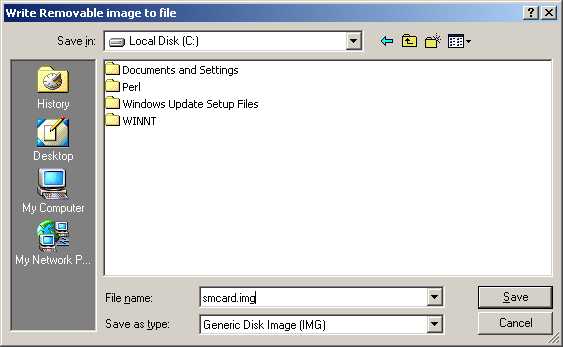
Undisker will ask you for a filename for the saved disk image. Save the file into the C:\ directory, with the name smcard.img as shown here:

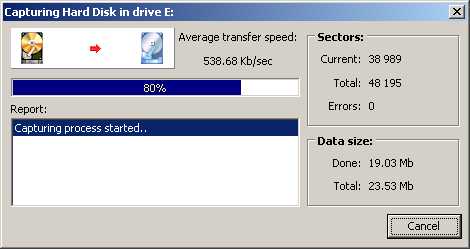
Now Undisker will go to work, and you'll see a window like this pop up while Undisker makes a disk image of your memory card:

Note that if your memory card has sustained physical damage, Undisker may encounter errors when attempting to make a disk image from it. This is probably where you'd see those errors.

Once the disk image is all set, go to the Start menu and select Run... In the window that comes up, start a command line program by typing command and clicking OK:

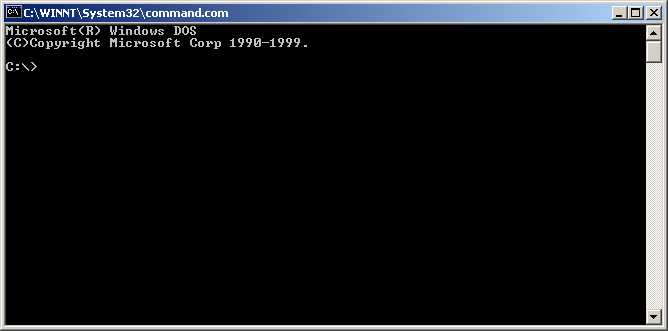
A window like the following will pop up. (If it doesn't say C:\>, type C: and hit return, then type cd \ and hit return.)

Assuming you followed all of the steps above, all you should have to do to run the jpg-recover program is type jpg-recover.pl and hit return. If everything worked, the JPEG recovery program will start up and will start printing things like the following on your screen. (Note: you might need to type "perl jpg-recover.pl" (without the quotes) if "jpg-recover.pl" all by itself doesn't work.)

When it's done (it'll announce how many picture fragments it was able to recover), try opening the pictures with your favorite image viewer. You should just be able to double-click on them in Windows Explorer; the picture below is me opening them in Microsoft Photo Editor:

If that didn't work, or you'd prefer to use commercial software, there are a couple of other options -- check out the links below.


So, To Recap...
1. Use Undisker (or a program like it) as described above, or if you're a Unix user, copy an image of the card to a file with dd.
example:   % dd if=/dev/rwd1d of=cardimage.img
2. Run a disk recovery program like Norton Utilities on the card. This recovered some of my images, but not all of them. Lucky for me, though, it recovered some images that my jpg-recover program could not, so I ended up with more recovered images than I would have had if I'd used either one of the tools alone.
3. If you can, run jpg-recover on the disk image. This recovered most of my images, but not quite all of them. Results will vary, so don't get your hopes up, and do try both this and the disk recovery step (#2) above.
4. Some other services/software exists to do this. I haven't used and don't endorse any of them, but they're more polished than my process and probably work better.

GOOD LUCK!